1. Add User

1. Add new User – Because WordPress does not allow us to change existing usernames, we have to create a New User (administrator) on the default install.
Navigate to Users/Add New User on the LH dashboard menu or click here.
For now just add a username, password, email address, administrator status and save changes.
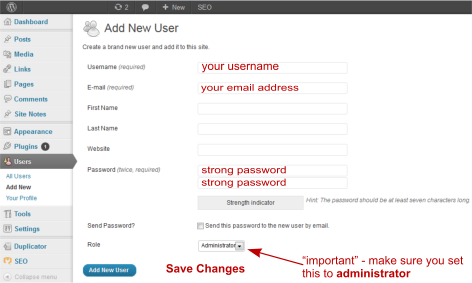
!IMPORTANT – LOG OUT & LOG BACK IN WITH YOUR NEW DETAILS!

2. Delete Default User
Now that we’re logged in with your new credentials , we need to delete the default user (tempusername).
Using the LH side dashboard menu, navigate to Users/All Users or click here:
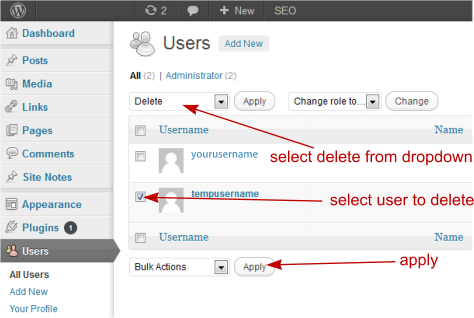
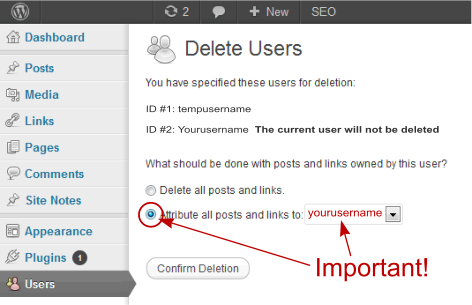
You need to ensure that “attribute all posts & links to:” is checked and points to your new username.
3. Site Settings
Although there are any number of settings that can be changed within the framework,
there are just a few settings to complete that are essential to the correct functioning of your website.
These settings relate to your own business credentials. Throughout the website there are instances of “keyword tokens” which can be managed from one location.
You change these details in one location and the changes are reflected across the website automatically.
3a. SettingsText Replace – From the LH dasboard navigate to settingtext replace or click here:
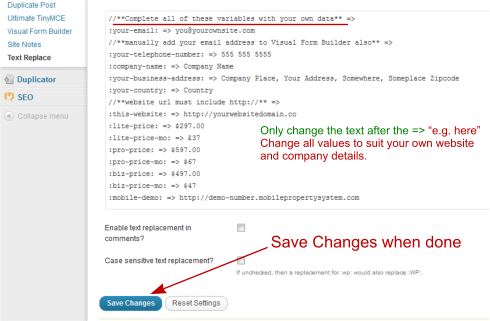
Most of these settings are required but ones that appear on the footer, eg. address etc can be omitted if desired.
Remember to save changes when done.
3b. Settings – Quotation page email address:
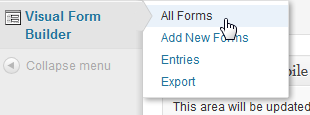
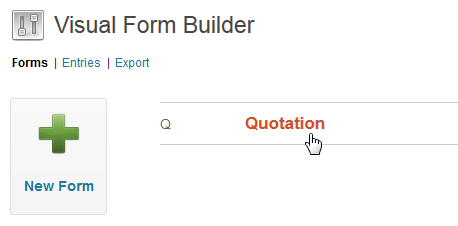
Select Visual Form Builder \ All Forms then click on “Quotation” form
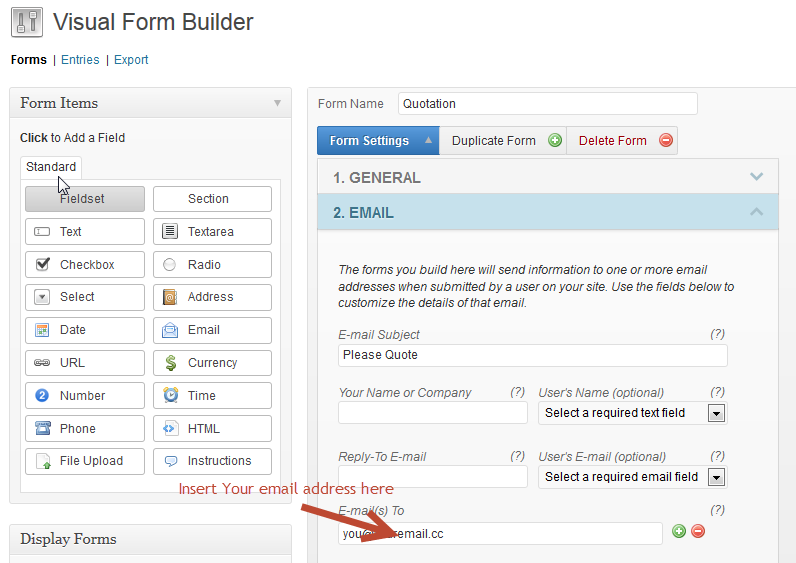
In the “emails to” field add your email address. Insert your company details in the field above if desired.
Sroll to bottom of page and “Save Changes”.
4. Logo
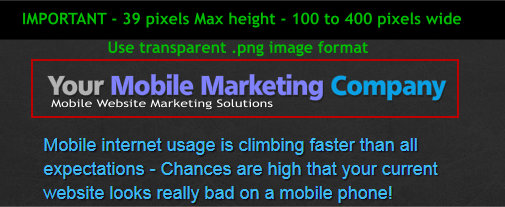
The header features a logo area for your company logo. Ideally images should be no larger than 400 pixels wide and 39 pixels tall.
To allow for the background to show through images should be in the transparent .png format.
To change your logo image, navigate to Appearence/Mobiz Theme Options or Click Here:
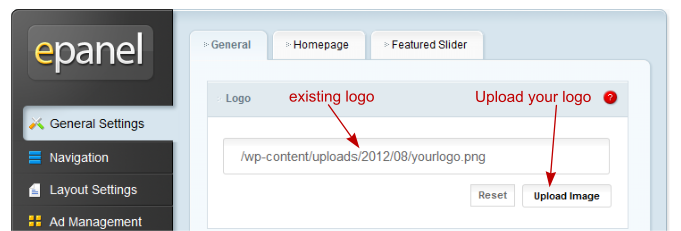
Click on the “Reset” tab to remove default image, then “upload image” tab to launch a file uploader and navigate around your hard drive to locate your logo image file and click open.
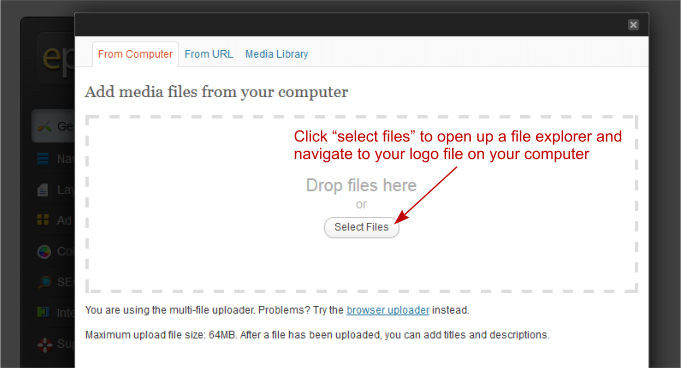
After selecting your logo file on your computer and clicking “open”, your image will begin uploading to your media library.
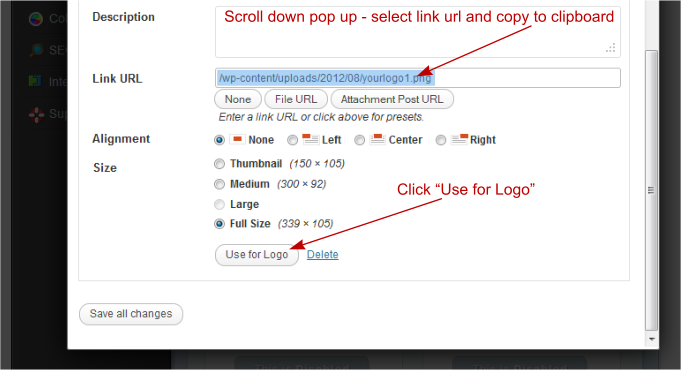
Scrolling down the pop up window look for your image “Link Url”, select it and copy to the clipboard then click “use for logo”.
Unfortunately this doesn’t always set the logo but returns us to the theme options editor. Paste the copied link url into the text window above upload image if it hasn’t been automatically added.
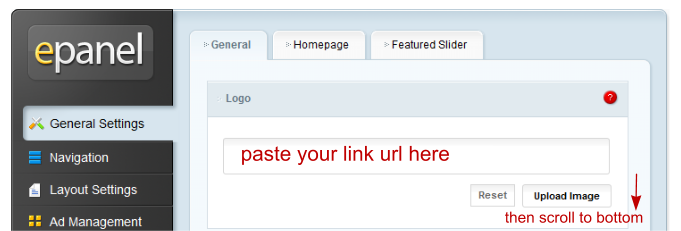
..and finally, scroll to the bottom of the theme editor and “Save” your changes. Your website should now feature your own image.

5. Mobile Redirect Placeholder
We have provided a temporary mobile redirect until you get your own mobile website up and running. Just access this website on your mobile phone for a quick demonstration.
Once you have created a mobile website of your own you will need to edit the mobile redirect plugin settings here or deactivate the plugin and use the redirect provided by your mobile website builder platform.
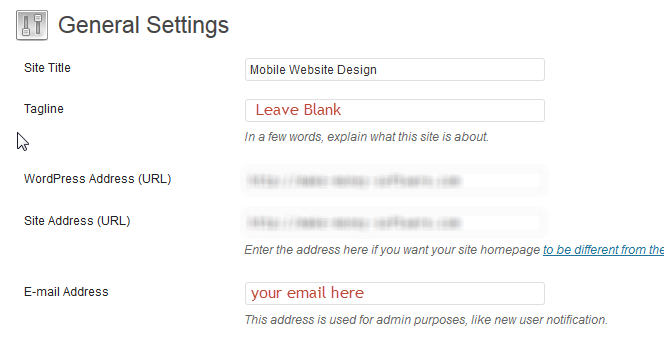
6. General Settings – email
There is one area where text replace does not replace your email address, so we have to manually add it. Go to Settings\General
7. And Finally a Warning!
Your site is now complete and fully configured to work with your details.
The user that you created has full administration capabilities, meaning you can do absolutely anything with your website, including BREAKING IT!
If you are a seasoned WordPress veteran then feel free to add pages, plugins or whatever but if you’re not quite so capable,
consider leaving everything as is and be proud that you got this far ![]()
If you are comfortable with tweaking wordpress themes, checkout the Theme Customization section below:


